Createx Candies

Scott

Double Actioner
I started playing around with some candies for the first time yesterday and am wondering if I am doing something wrong or if this is normal for them.

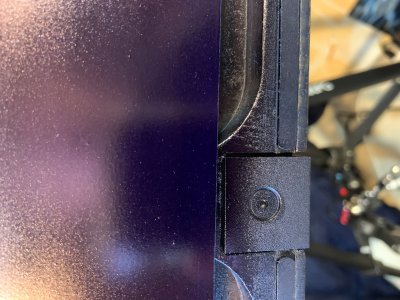
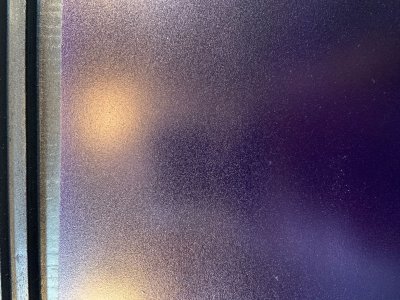
I seem to be getting some texture out of them when I lay them down. I’m working on an Ampersand smooth panel but now that I have 7-8 coats of the candy down there is a slight texture to it over most of the panel, but there are parts that are still nice and smooth, the texture looks as though someone went in with a handful of super fine dust and blew it on the wet paint. Is this an issue with the application of the paint or just the nature of candies?

I mixed the candies about 50/50 with 4030 and then reduced it with roughly 10-15% 4012 and applied it with about 25psi out of my Neo.

I’m working on getting some pictures, I just need to resize them first
 
You can see in the first picture that it is nice and smooth in some places and you can hopefully see the texture in the second photo. The panel started out super smooth with not texture at all. Sorry not sure why its putting the pictures sideways.candies.jpeg candies 2.jpeg
 
A couple of things....
You used a mix of 50/50 which is more for bigger spray guns...candy2o is airbrushed in a more concentrate mix compared to spray-gun use......I mix mine around 20-30% 4030
And you could be holding your airbrush too far back, causing the paint to dry before it hits the surface....
Hope this helps
 
Okay. Thanks for the info, that makes sense I found myself getting farther away as worked to the top of the panel. Next time I will try to mix the 4030/paint alittle more like you recommend.
 
From memory I think it use to recommend 4012, but due to issues it no longer recommended. Siroxx has linked the most current TDS, which recommends 4011 or the new 4013
 
4012 is all I have ever used and with the 20-30% 4030 mix, less was needed as the candy is pretty thin. Maybe that is why i never had a problem. I also do a slurry (4030 and 4012 mix) before adding the candy so I have never had a problem with seeding. I haven't used any candies since they recommended using 4011, so I will use that next time and see if I find a difference....
Another thing good about a stronger mix with the candies, is that you need fewer coats to achieve color.
 
4012 does not play well with Wicked or the Candy , That is the reason they came out with the 4013 , Too many had seeding problems with the 4012.
That is why when I called about it on a candy job I was working on Createx told me to use just the 4020.
While some have had no issues with the 4012 Like Steve Leahy and twood others have.
Plus you have to stop and think if 4012 was doing it's job they would not be pulling it and replacing it with the 4013. Same thing with the 4030 use to be the intercoat clear now it is the balancing clear and the 4040 is more of an intercoat clear being it stop bleeding through the different layers of candy.
 
I need to try some 4013, but for now 4011 seems to be working nicely for me. If left for 10 mins after mixing it comes out really smooth.
 
I would recommend using a tack rag in between coats (once each coat has dried) as it does tend to cause little dry bits.

Lee
 
Thanks everyone for the suggestions. I will look at getting some of the 4013 when I put in an order for some more paint, all I can get around here is the 4012. With this texture that I have induced onto the panel will it have a negative effect on the candy effect? I still plan on doing my painting over top of it because it is just a practice piece anyways but if I happen to run into this problem in the future is it worth continuing or just scraping it and starting over?
 
It’s difficult to see what exactly has caused the problem. But really the best way to know is to finish this piece as you intend to and see what happens. Then you’ll know if it’s worth ditching it in the future.
 
Thanks everyone for the suggestions. I will look at getting some of the 4013 when I put in an order for some more paint, all I can get around here is the 4012. With this texture that I have induced onto the panel will it have a negative effect on the candy effect? I still plan on doing my painting over top of it because it is just a practice piece anyways but if I happen to run into this problem in the future is it worth continuing or just scraping it and starting over?

@Scott You maybe able to sand it down with 600 grit wet / dry sand paper on a sanding block. OR a Fine scotch bright pad around a sanding block AND SAVE IT. But I would suggest doing a small flat panel the same way you did the one in your pics ( to get the texture again ) , and try on that. One third dry sand paper it and the other third wet sand paper and the last third FINE scotch bright pad it, and see which one turns out better. Then do the best sanding results on the larger panel you are doing. After sanding or scotch padding , tack rag it good to get all the dust off and blow it off with air. Then respray a couple coats of candy over it with just the candy and 4030, NO 4012. You may be able to get it to smooth out with 2 or 3 coats. Like the others said, make sure you are not holding your airbrush too far away and getting dry spray all over the panel. Test spray the paint for distance on the sanding test panel, 3 different distances to get it right, with even, stripe free passes / strokes using a 50% overlap on each pass.

Also if I may make a suggestion, the Neo is a nice starter airbrush of good quality, but for doing a larger panel you may want to get a Paasche Talon with the 3 needle sizes .25mm .38mm and a very large .66mm, it also comes with a fan spray head / air cap for that .66mm needle, that will do a 3 inch fan pattern with ease, for around a 115 or 120 bucks. OR the Mini gun Paasche makes with a .8mm needle set up that has a 3 oz aluminum paint cup and lid ,that they sell for about 55 bucks.

Paasche Mini Spray Gun Link. https://www.midwestairbrush.com/pahghvtoupgu.html 52.00 dollars

Paasche Talon airbrush set link. https://spraygunner.com/paasche-talon-tg-3f/ 97.00 dollars

I have to disagree with sanding. Because candies get darker with ever coat if you sand them you will get variations in colour consistency. That's why they repaint complete panels don't do touch ups on candy paint jobs

If you are keen to move forward with airbrushing over it, try laying down some intercoat or clear coat and then sanding that with 600 - 800 wet so you are sanding the clear and not the candy. I also think it's best to have a mini spray gun or at least a Iwata TH airbush for small panels when laying down candy.

Best of luck
 
@Scott You maybe able to sand it down with 600 grit wet / dry sand paper on a sanding block. OR a Fine scotch bright pad around a sanding block AND SAVE IT. But I would suggest doing a small flat panel the same way you did the one in your pics ( to get the texture again ) , and try on that. One third dry sand paper it and the other third wet sand paper and the last third FINE scotch bright pad it, and see which one turns out better. Then do the best sanding results on the larger panel you are doing. After sanding or scotch padding , tack rag it good to get all the dust off and blow it off with air. Then respray a couple coats of candy over it with just the candy and 4030, NO 4012. You may be able to get it to smooth out with 2 or 3 coats. Like the others said, make sure you are not holding your airbrush too far away and getting dry spray all over the panel. Test spray the paint for distance on the sanding test panel, 3 different distances to get it right, with even, stripe free passes / strokes using a 50% overlap on each pass.

Also if I may make a suggestion, the Neo is a nice starter airbrush of good quality, but for doing a larger panel you may want to get a Paasche Talon with the 3 needle sizes .25mm .38mm and a very large .66mm, it also comes with a fan spray head / air cap for that .66mm needle, that will do a 3 inch fan pattern with ease, for around a 115 or 120 bucks. OR the Mini gun Paasche makes with a .8mm needle set up that has a 3 oz aluminum paint cup and lid ,that they sell for about 55 bucks.

Paasche Mini Spray Gun Link. https://www.midwestairbrush.com/pahghvtoupgu.html 52.00 dollars

Paasche Talon airbrush set link. https://spraygunner.com/paasche-talon-tg-3f/ 97.00 dollars


Thank you for the suggestions I may give that a shot. Like I said this is more of an experiment piece just to see how candies work and to try out a theory, and quite honestly the pieces I will probably work with an airbrush at 8x10, most of not all of my work will be on ice fishing rod handles that are about 3” long and 3” in diameter. So pretty small.

I think I will continue on with this pieces and see what happens, maybe do it again later once I can pick up some 4013.
 
I have to disagree with sanding. Because candies get darker with ever coat if you sand them you will get variations in colour consistency. That's why they repaint complete panels don't do touch ups on candy paint jobs

If you are keen to move forward with airbrushing over it, try laying down some intercoat or clear coat and then sanding that with 600 - 800 wet so you are sanding the clear and not the candy. I also think it's best to have a mini spray gun or at least a Iwata TH airbush for small panels when laying down candy.

Best of luck


@michael13 Some nights I need to sleep instead of coming on here to offer help...lol You are 100% correct in your statement on color variations when sanding a panel for spot touching up a candied panel. I was under the impression from the pictures he posted , that he would not be spot touching it up but leveling out the whole panel and starting over basically. I thought if he applied the color he has on it evenly then sanding the whole panel evenly it should not cause too much of any color variation / blotchy coloring. If he does not break through the paint thats on it to a lighter base or bare panel, I thought he may be able to get away with it or learn from it. He did say it was a practice panel, so I though he could learn a little about sanding to save a project and reapplying color over it. OR even find that the pattern that comes out of sanding it, looks cool for his project. Never know till you try I guess. But again I was thinking of, what I don't know at 3 AM in the morning, maybe I had base coat clear coat on the brain. A lot of others have more airbrush info and talent than I, so maybe Scott should just ignore me... lol
 
Thank you for the suggestions I may give that a shot. Like I said this is more of an experiment piece just to see how candies work and to try out a theory, and quite honestly the pieces I will probably work with an airbrush at 8x10, most of not all of my work will be on ice fishing rod handles that are about 3” long and 3” in diameter. So pretty small.

I think I will continue on with this pieces and see what happens, maybe do it again later once I can pick up some 4013.


@Scott Hey what size needle is in that Neo anyway ? I was thinking it was a .3mm setup. If it is only a .3 or a ,35mm it is way too small to do a whole panel with any paint, let alone a panel in candy. Oh BTW I have the Paasche Talon 3 needle set and that fan spray cap, it does work nice for a semi large panel if you don't have a mini gun. I wouldn't paint a fender with it, but a 8x10 or 12x16 or even a 20x20 panel it would work on just fine I think. Good luck with your project, hope it comes out well for you what ever you do to it.
 
Last edited:
@Scott Hey what size needle is in that Neo anyway ? I was thinking it was a .3mm setup. If it is only a .3 or a ,35mm it is way too small to do a whole panel with any paint, let alone a panel in candy. Oh BTW I have the Paasche Talon 3 needle set and that fan spray cap, it does work nice for a semi large panel if you don't have a mini gun. I wouldn't paint a fender with it, but a 8x10 or 12x16 or even a 20x20 panel it would work on just fine I think. Good luck with your project, hope it comes out well for you what ever you do to it.

the one that I have is .35, and you are right it’s not the best for coating a panel, it works just not ideally. One of these days I may step up to a mini gun if my handles take off and people are interested in them, but it works for now.
 
@Scott
Also if I may make a suggestion, the Neo is a nice starter airbrush of good quality, but for doing a larger panel you may want to get a Paasche Talon with the 3 needle sizes .25mm .38mm and a very large .66mm, it also comes with a fan spray head / air cap for that .66mm needle, that will do a 3 inch fan pattern with ease, for around a 115 or 120 bucks. OR the Mini gun Paasche makes with a .8mm needle set up that has a 3 oz aluminum paint cup and lid ,that they sell for about 55 bucks.

Paasche Mini Spray Gun Link. https://www.midwestairbrush.com/pahghvtoupgu.html 52.00 dollars

Paasche Talon airbrush set link. https://spraygunner.com/paasche-talon-tg-3f/ 97.00 dollars

Paasche Talon is a piece of junk. Fan cap eats a lot of air and a pattern is irregular. Candy is demanding, I suggest quality LVLP (lph80) and at least dental compressor for a large candy paint jobs. Talon (factory bended needles) is a waste of money.
 
Back
Top