GIMP Getting Started + Free T-Shirt Mock-Up

somewhereman

Double Actioner
*** Send Me a PM with your Email for the Free T-Shirt Mockup ***
it is too large a file to host here

gimp is a free photoshop alternative and can be downloaded here
(i would also highly recommend downloading and installing gmic here, this will add many filters and options)

i use gimp 2.10 and the free t-shirt mock-up should be used with it (no guarantees with any older version)

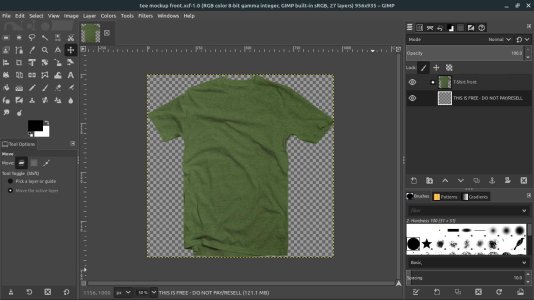
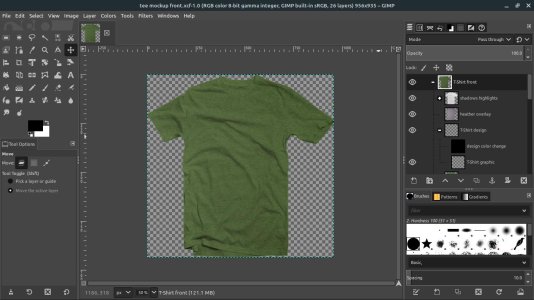
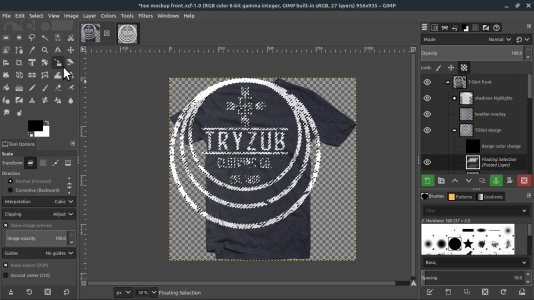
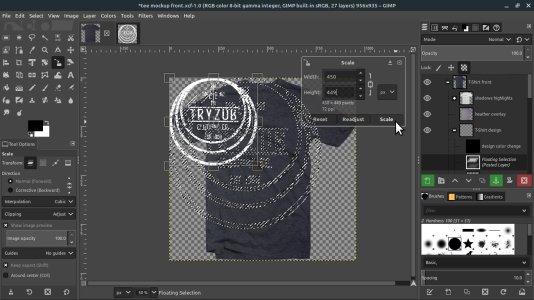
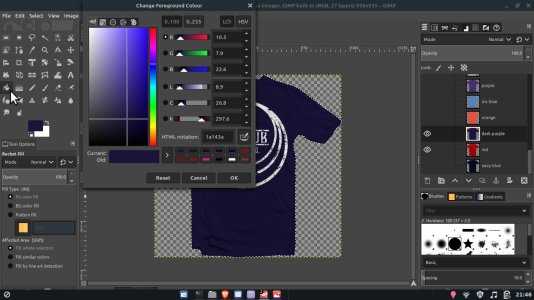
the mockup is handy for websites or to show your customers how a design will look on a tee

gimp is a very deep and robust program, so don't let the free fool you,
and as such does take some learning to become proficient

here are some free tutorials to introduce you to gimp and some of its basic tools (simply signup and watch/attend at your leisure):
- fast photo editing tricks& tips for gimp
- gimp crash course for beginners
- the ultimate gimp 2.10 guide

for those coming from photoshop, here is a tutorial to help ease the transition:
- make gimp 2.10 work like photoshop

there are also many other online resources should you need them, below are a couple to start with:
- videos - gimp workshop
- website/forums - gimp users
- gimp.org tutorials
- plus your manual in gimp itself is very helpful


none of this is necessary if all you want is the mock-up, i will walk you through the whole process in the below posts

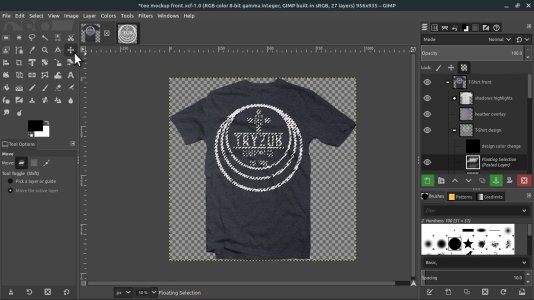
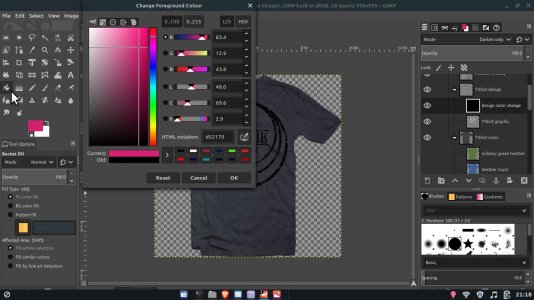
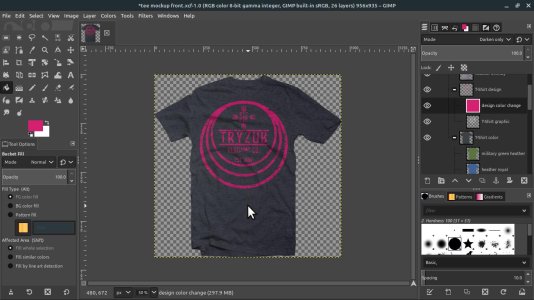
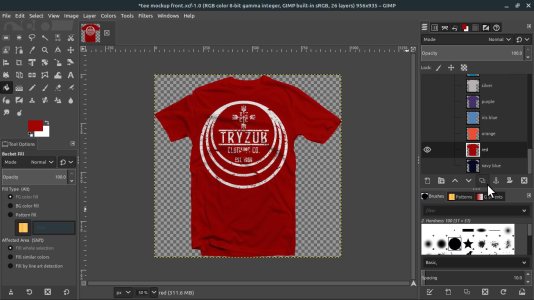
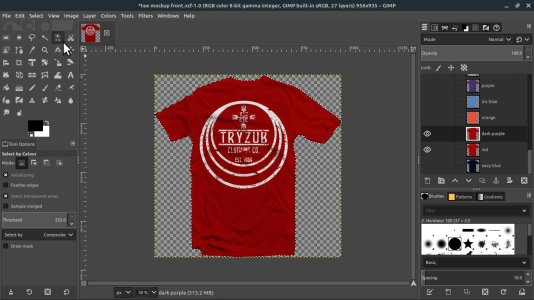
on to the t-shirt mock-up and how to use it within gimp....
 
phase 1 it begins
(see image below)

- you will recieve two zip files, one is for the front and one is for the back
- unzip your files and save them to a folder you can easily locate them
- copy and paste both of them in the same folder and rename to something like 'original do not use'
(in case you really mess up, you always want the originals to copy and save again)

- open the one you want to use in gimp (the pics are of the front tee, but the back works exactly the same)
- click on the 'layers' tab at the top left of the right side menu if it is already not selected and it will look like the pic
- where the large white pointer is, click the 'plus', this opens up all the components of the file/image, if you see a 'minus' this closes it back up (see pic 2)

- along the left hand side of this list is a little eye, some components have it and some don't
this eye means that particular component is on/visible
-if you look at the shirt image it has a heather-look, now go to the menu and click the eye beside 'heather overlay'
the heather is off and disappears, click it again to turn it on (i do alot of heather tee's, so this is a handy option to get that heather look)
- as you scroll down the menu you will see 'T-Shirt color' (click the plus if it is not open fully), this section will really drive home the 'eye's' purpose

- the first color tee (military heather green) has the eye beside it, go down two colors to 'dark grey heather;, and click its eye
nothing happened because the green eye is still on and it is above/on top of the dark grey
now click the green eye of and the t-shirt is now the dark grey heather
(if you ever get stuck and wonder why something is not displaying right, check your eyes first)

next post adding a design....
 

Attachments

  • opening scene.jpg
    opening scene.jpg
    109.9 KB · Views: 14
  • opening scene2.jpg
    opening scene2.jpg
    113 KB · Views: 13
adding a design in the mock-up

- find 'T-Shirt design' in the left hand layer window,and click the plus if it is not open fully
- leave the ''design color change' eye off for now (next post covers its use) and click on the 'T-Shirt graphic' text
this highlights the component and activates it (any work done is on the 'activated layer)

- copy your design by clicking 'Edit' in the upper horizontal main menu, then click 'Paste in Place'
or ctrl-alt-v together (if you click ctrl-v you will get a new layer and can lead to confusion later on
- you can change this to ctrl-v by going to 'Edit' in the upper menu, click 'Keyboard Shortcuts',
then the 'plus' by 'Edit', scroll down to 'Paste in Place and left-click, then hit ctrl-v
click 'Reassign Shortcut' and ensure the box at the bottom by 'Save shortcuts on exit' is clicked)

- with your design now on the 'T-Shirt graphic' layer you will notice it has a moving highlight around it (called marching ants)
and is labelled as a 'Floating Selection (Pasted Layer) in the far right layer window (see pic1)

- resize the design by clicking scale icon in the left tool section (look for the big white mouse pointer in pic1)
- then click around the highlighted design you just pasted and a window will popup with some options,
as well as a box with control boxes around your design
you can input any numbers you want in the popup and hit 'Scale' or drag any of the control handles (the corners scale horizontal and vertical equally)
see pic2

- i like around 450px for a width even though it probably won't be that big in reality as it shows off the design well
- move your design to where you want it with the move tool from the left tool section (looks like a 4-arrow direction - see pic3),
or use the arrow keys

-once you are happy with its size and placement click the green anchor under the layer window on the right - see pic4
- now click 'File' in the upper left top horizontal menu and click "Export As...' to save your picture
(save as a png with transparent background or jpg with a white background)

- change the t-shirt color by clicking on the eye you want to change it to and clicking off the other eyes
- you can save the whole setup by clicking 'Save As...' under the file menu,
or to add a different design, click on the 'T-Shirt Graphic' component in the right layer window, select all (ctrl-a)
and then delete, deselect all and add your new design

next post is changing the design color
 

Attachments

  • adding a design1.jpg
    adding a design1.jpg
    156.6 KB · Views: 14
  • adding a design2.jpg
    adding a design2.jpg
    162.3 KB · Views: 12
  • adding a design3.jpeg
    adding a design3.jpeg
    166.9 KB · Views: 11
  • adding a design4.jpg
    adding a design4.jpg
    143.1 KB · Views: 13
@page { margin: 2cm } p { margin-bottom: 0.25cm; line-height: 115% } a:link { so-language: zxx }
you have your design on your tee in the mock-up but you want different colors of the same design mocked-up
no need to delete the design and recreate it in a different color

- click the 'design color change' component under the 'T-Shirt design' component in the right layer window - see pic 1
- click the eye beside it and your design is now black - see pic 2

- to change this to any other color, click the paint bucket/fill tool in the left tool section - see pic 3
- then click the black box just down below the tool section and it pulls up the color picker popup,
you can drag the cross-hair in the large color window, drag vertically on the smaller window to the right
or drag the arrows on the bars to the right or input any numbers you want

- after picking your color move your cursor into the image and click anywhere in there to change your design to that color - see pic 4
- to change it back to the original click the eye off

next post will be changing shirt color...
 

Attachments

  • changing design color1.jpeg
    changing design color1.jpeg
    161.5 KB · Views: 9
  • changing design color2.jpg
    changing design color2.jpg
    125.3 KB · Views: 10
  • changing design color3.jpeg
    changing design color3.jpeg
    161 KB · Views: 9
  • changing design color4.jpg
    changing design color4.jpg
    130.5 KB · Views: 10
the colors under the 'T-Shirt color' component are ones i made for gildan sofstyle, but you can change these, or keep them and to to them

- click on any of the colors in there to highlight/activate it and then click the set of two boxes right under it (duplicate layer) - see pic1
- now you will see right above it a new highlighted/activated layer called (--- copy)

- right-click on this and at the very top of the popup menu is 'Edit Layer Attributes',
click this and change the name to whatever color you are adding - see pic2

- in the left tool section click the select by color tool in the upper row, and make sure the threshold is all the way right to 255 - see pic3
- then click on the tee and you should now have a highlighted tee (marching ants around the tee only)

- go back to the tool box and click the paint bucket/fill tool and the black box below it to choose your new color - see pic4

- click select none and you are done
 

Attachments

  • changing tee color1.jpg
    changing tee color1.jpg
    131.1 KB · Views: 12
  • changing tee color2.jpg
    changing tee color2.jpg
    117.9 KB · Views: 11
  • changing tee color3.jpg
    changing tee color3.jpg
    133.6 KB · Views: 11
  • changing tee color4.jpg
    changing tee color4.jpg
    128.8 KB · Views: 12
I'm sure this will assist quite a few members, thank you for taking the time to share.
this same concept be of use for non tshirt work to I would think. handy bit of knowledge.
 
Back
Top