3 Old Beauties

Looks great. I am sure you will get it sorted if you keep after it.
Thanks Dave, and for the encouragement. I’ll get it working one way or another. Just might take me a while.

I emailed the company who are linked with the inventor, who I think @Kingpin pointed me to.m, earlier in this thread. Inventor’s granddaughter replied, she knows the part i mean as she used to service them herself and she will see if they have one in the remaining parts, which it doesn’t sound like they have much of. But fingers crossed that might be a solution.
 
In what way? lets see if We can figure this out :)

Is that a resin printed QC? A new printed replacement for the brass part might be an option :)
I think the shape/size is just a bit wrong and so it doesn’t work quite right. A 3d printed part should work well. Maybe with a reinforced leg, or metal pin for a leg even. I’ll need to get a plastic one for reference first. My modeling skills are limited but I might manage it.

The adapter is resin printed. I took an existing file of a rotring adapter someone had made and inverted it. Fits perfectly on the conopois and I was surprised how well it worked. Even the quick release part seems strong but that is probably the weak point. I might remove that off the model and merge it with a file that has a thread to take a metal QR instead. I think that would be a better long term solution. Print you one at the same time if you like.
 
That would be brilliant if You could, thank You :)

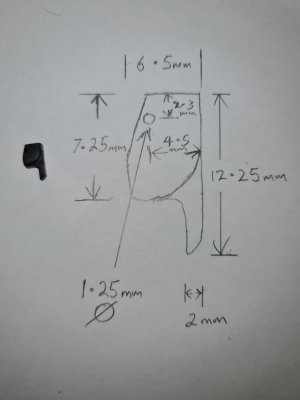
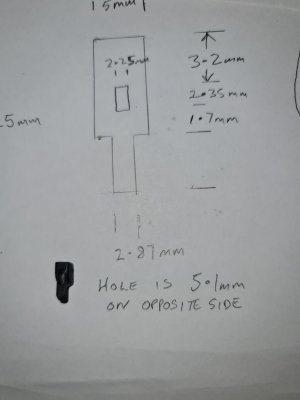
If You want dimensions of the plastic one let Me know and I will take mine apart again and measure it with calipers :)
no problem at all, happy to.

If i don’t end up buying another conopois soon then next time you have your one out, it would certainly help if you jot down the various dimensions, thanks. No rush at all though because an additional distraction arrived in the post today.
 
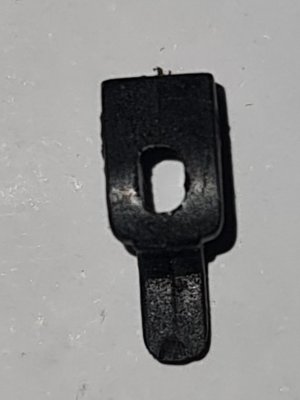
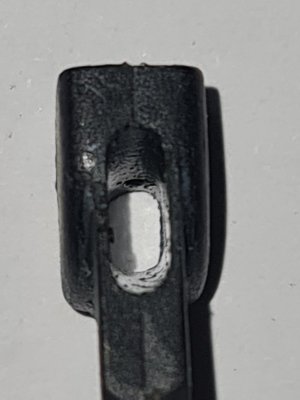
Wiz, I have done these pics, hope they are what You are after, If You want any other measurements let Me know :)
20240120_195847.jpg20240120_201057.jpg20240120_201143.jpg20240120_201132.jpg
 
Also, when the trigger screw is all the way in the trigger moves the needle back about 1.7mm I think You said You had about .5mm of travel. so this info may also help :)
 
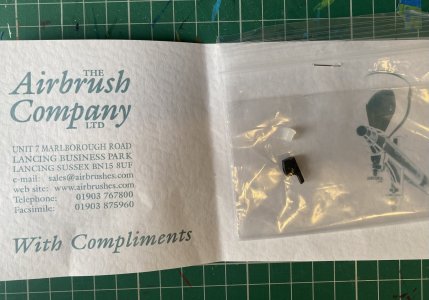
look what came today:
ECC61174-803B-4F07-8251-D2B135D39924.jpeg
I contacted them as i think @Kingpin suggested and although they don’t have many parts left it turns out they do have plenty of these, and they kindly sent me free of charge! Next time i need an airbrush part for my iwata or whatever I will give them some business for sure.

I feel bad now @Kingpin that you went to all that trouble to give me dimensions for the part so i could try and make one. Still appreciated!
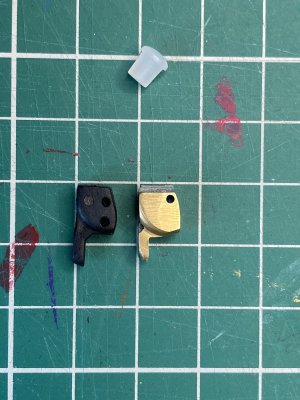
Here is a comparison (black part only has one hole, the second “hole”, convincing as it is in the photo, is not there! It’s just a shadow from the moulding. Even with the bit if plastic i stuck on the brass bit to increase its height the leg isn’t quite as long either. And bottom right edge wont contact the chucking mechanism as soon when tilted.
BA76AC2B-D1AE-4395-A7D3-5E7875C023A4.jpeg

Haven’t tested it yet. Got to do way less pleasant things with my day today. Hopefully soon.
 
So i lost the little brass screw that makes the selector ring work. I swear it was in the box with the other disassembled pieces. Can’t see it anywhere. 😭
 
having found the errant screw i’ve finally put it back together with the new trigger part, and it now retracts the needle as it should. Awesome.

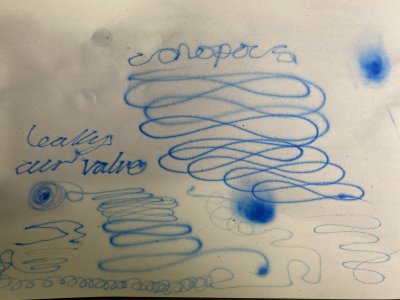
I tested it with paint, and…
3ACD4A8D-51B8-4A36-B3EC-D9DE84DB5DC3.jpeg

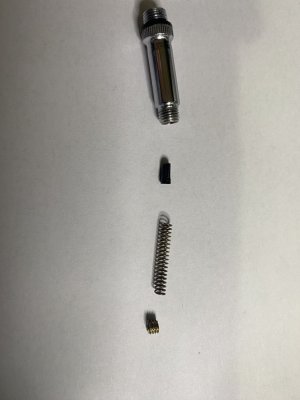
…the air valve is leaking air constantly through the brush. It’s a bit grainy too. The leak or something else, I don’t know yet. Better fix the leak and see. It leaks because the air valve is very basic and just not very good really. Its just a piece of plastic pushed onto another piece of plastic by a spring. I believe the plastic part in the valve should have a bit to slot into the middle of the spring but even so I’m not sure that would fix make it much better. Here’s what I have. Not sure what to do about it really. I didn’t photo it but there is a plastic insert at the top end of rhe valve with a hole. The plastic bit pictured obviously pushes against that hole but doesn't seal great. Its only supposed to open when the trigger is pressed (obviously) which pushes a rod back against the other side of the small plastic bit overcoming the force of the spring to unseal it. I know most of you get that already but some ppl might not.

B8760DC0-591B-4CC2-AB21-759CBF3D462A.jpeg

So one step forward one step back. to make myself feel a bit better i got out another toy that I have not posted about yet. Will when i can but there’s a big clue on the test sheet i did anyway.F78408DE-403A-4B86-87CB-C25DA60C991D.jpeg
 
Back
Top